To capture a clip to store in ClipMagic, all you have to do is highlight the text, file, or image in question and copy it to the clipboard. This is usually done by pressing CTRL-C, or Edit/Copy. The item will then be placed either in the default ClipMagic category or another category if any rules have been set up that the item matches.
When you copy something from a web page in Netscape, Opera, Internet Explorer or any Internet Explorer based web browser, ClipMagic recognises that it came from the web and captures the page's URL along with the usual information. The URL is displayed in the 6th column of the details pane. If HTML data is on the clipboard, ClipMagic will also store the HTML in the Clip Comments (unless a rule has been set up to request comments from the user - we wouldn't want to overwrite what the user enters).
When you copy a URL to the clipboard that isn't from a web page - i.e. there is no source URL as in the case of a web page - ClipMagic will store that URL in the same way as it would if it was a web clip. This means you can navigate to the clip's URL at any time just as you would with a web clip.
To create a new category select "New Category" from the Categories menu, or press CTRL-Insert. You can also click the tool bar icon that looks like a book (see Main Toolbar), or use the category pane right click menu.
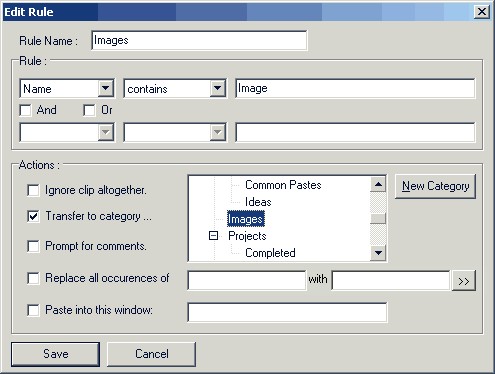
Rules and Filters allow you to determine what should happen to a clip at the time it is captured by ClipMagic. For example, you could set up a rule that automatically places all clippings copied from a specific web site to a specific folder or ignore all clips taken from a certain application.
Suppose you want all clips captured from Microsoft's support web site stored in a category called 'Microsoft Support' (probably a great idea as you'll have all those knowledge base articles at hand in case your recent Windows problem resurfaces!). Here's what the rule would look like :
To create a new clip without capturing anything from another application, just select 'New (Manual Entry)' from the File menu. You can also press CTRL-N, or click on the New Entry button on the main toolbar.
You will be asked to give the item a name and the new clip will be placed in the current category. The default name is 'ClipMagic Note'. You can edit the new item as normal and save your modifications by pressing the save button, or selecting File/Save.
Moving clips to different categories
To move an item or a group of items to a different category, just highlight the item or items in question and drag them over to the appropriate category.
|